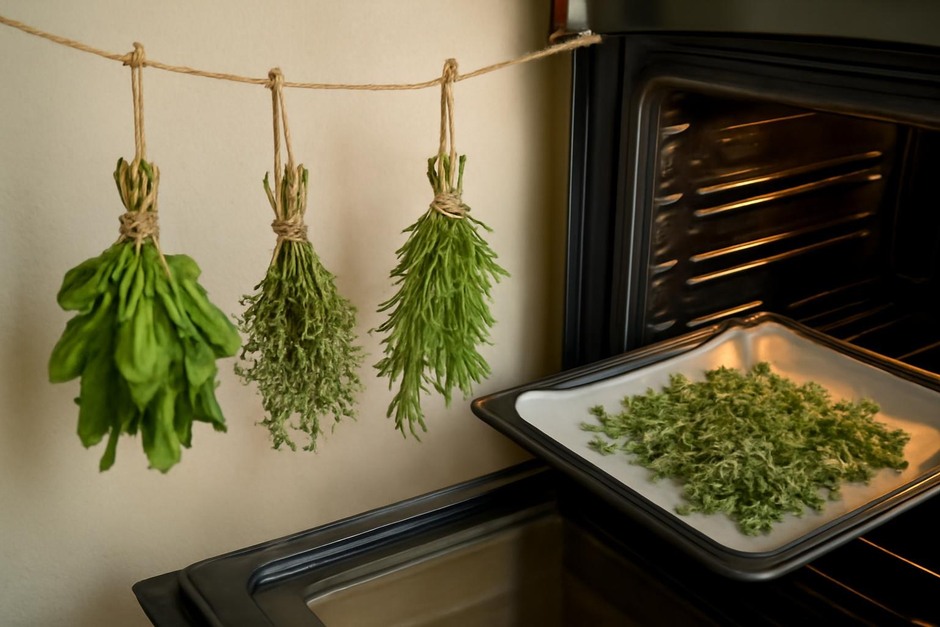
Drying herbs is one of those ordinary kitchen activities that rewards careful observation: the time of day you harvest, how leaves hold their color, and how the air moves in the space where you hang a bundle matter. Two straightforward approaches dominate home practice—air-drying and low-heat oven drying. Each has clear trade-offs in speed, flavor retention, space needs, and reliability. Below is a practical comparison followed by guidance to help you choose the right method for the season and your pantry.
Approach A: Air-Drying (hang-and-wait)
Air-drying is the traditional, low-intervention way: you tie herb stems in small bunches, hang them in a warm, dry, well-ventilated spot out of direct sun, and wait until the leaves crumble. It’s passive but requires time and the right conditions.
How to do it
- Harvest in the morning after dew has evaporated. Cut whole stems rather than individual leaves.
- Rinse briefly if needed and pat very dry. Excess water invites mold.
- Bundle stems in groups of about 6–12, secure with twine, and hang upside down in a single layer.
- Choose a spot with steady air movement, low humidity, and out of direct sunlight—an attic, spare room, or kitchen pantry can work.
- Allow 1–3 weeks depending on herb thickness and humidity. Test readiness by crushing leaves; they should crumble easily.
Pros and cons
- Pros: Minimal equipment, gentle on flavor and aroma, low energy use.
- Cons: Slow, requires dry conditions and space to hang, risk of mold in humid weather.
Approach B: Low-Heat Oven Drying (fast and controlled)
For speed or when outdoor conditions are poor, a home oven set to its lowest temperature works well. This method concentrates heat to remove moisture faster while still preserving much of the herb’s character if you pay attention.
How to do it
- Preheat the oven to the lowest setting possible (often 170–200°F / 75–95°C). If your oven doesn’t go that low, use the pilot or keep the door slightly ajar to let temps dip.
- Prepare herbs as above—clean and pat dry, remove any discolored leaves.
- Arrange stems or leaves in a single layer on a baking sheet lined with parchment. Don’t overcrowd.
- Place the sheet on the middle rack and leave the door cracked a few inches to allow moisture to escape and keep temperatures lower. Check every 10–15 minutes; total time is often 30–90 minutes depending on leaf thickness.
- Remove when leaves crumble between fingers. Let cool before storing.
Pros and cons
- Pros: Fast and reliable, works in any season, takes little space.
- Cons: Uses energy, risks flavor loss or browning if temperature is too high or leaves are left too long.
How to choose between them
Choose the method that fits the conditions you can observe and control. Below are practical criteria and simple heuristics to help you decide.
1. Time and urgency
- If you need herbs ready within hours or a couple of days—use the low-heat oven.
- If you can wait and want the gentlest result, air-drying is preferable.
2. Volume and space
- For large harvests with limited oven space, air-drying (hung in batches) scales better.
- If you have a small harvest and little room to hang bunches, the oven is more efficient.
3. Climate and humidity
- High-humidity conditions favor the oven method to avoid mold. If humidity is below roughly 50% and air can circulate, air-drying works beautifully.
- In damp months, consider a dehumidified room or the oven for reliability.
4. Desired flavor and appearance
- Air-drying tends to preserve volatile aromatics and color better for delicate herbs like basil, dill, or mint.
- Oven-drying is well suited to hardy herbs such as rosemary, thyme, and oregano that tolerate more heat.
As a rule of thumb: choose air-dry for delicate leaves, aroma-focused uses, and when time is not an issue; choose the low-heat oven for speed, poor drying conditions, or small batches.
Final practical tips
- Label and store dried herbs in airtight containers away from light; crush leaves just before using to retain aroma.
- Always check a few leaves for tackiness or off smells before storing—these are signs of incomplete drying.
- If you’re unsure, split your harvest: air-dry half and oven-dry half. Observe differences in scent and color after a week to refine your method for future harvests.
Drying herbs is a small, observant practice: note how quickly leaves go brittle, how scent changes, and which spots in your home stay dry. Over a few seasons you’ll develop a reliable rhythm that suits your kitchen, your climate, and the way you cook.